Setting up a Multiplayer Project
This is a walk through of an example networking project with considerations of the argosVu drawing and state functionality.
NetworkManager Setup
The first step is to create a NetworkManager object in the project:
- Add a new empty game object, from the menu Game Object -> Create Empty.
- Find the newly created object in the Hierarchy View and select it
- Rename the object to “NetworkManager” from the right-click context menu or by clicking on the object’s name and typing.
- In the inspector window for the object, click the Add Component button
- Find the component Network -> NetworkManager and add it to the object. This component manages the network state of the game.
- Find the component Network -> NetworkManagerHUD and add it to the object. This component supplies a simple user interface in your game for controlling the network state.

For more details, see Using the NetworkManager.
Setup the Player Prefab
The next step is to setup the Unity Prefab that represents the player in the game. By default, the NetworkManager instantiates an object for each player by cloning the player prefab. In this example, the player object will be a simple cube.
- Create a new Cube from the menu Game Object -> 3D Object -> Cube
Here we need to consider the camera and its interaction with the reticle and the draw functions – The prefab needs to collect GOs like ArgosSphere and links to UI events – Player roles i.e. local/remote need to be differentiated.
- In the inspector window for the object click the Add Component button
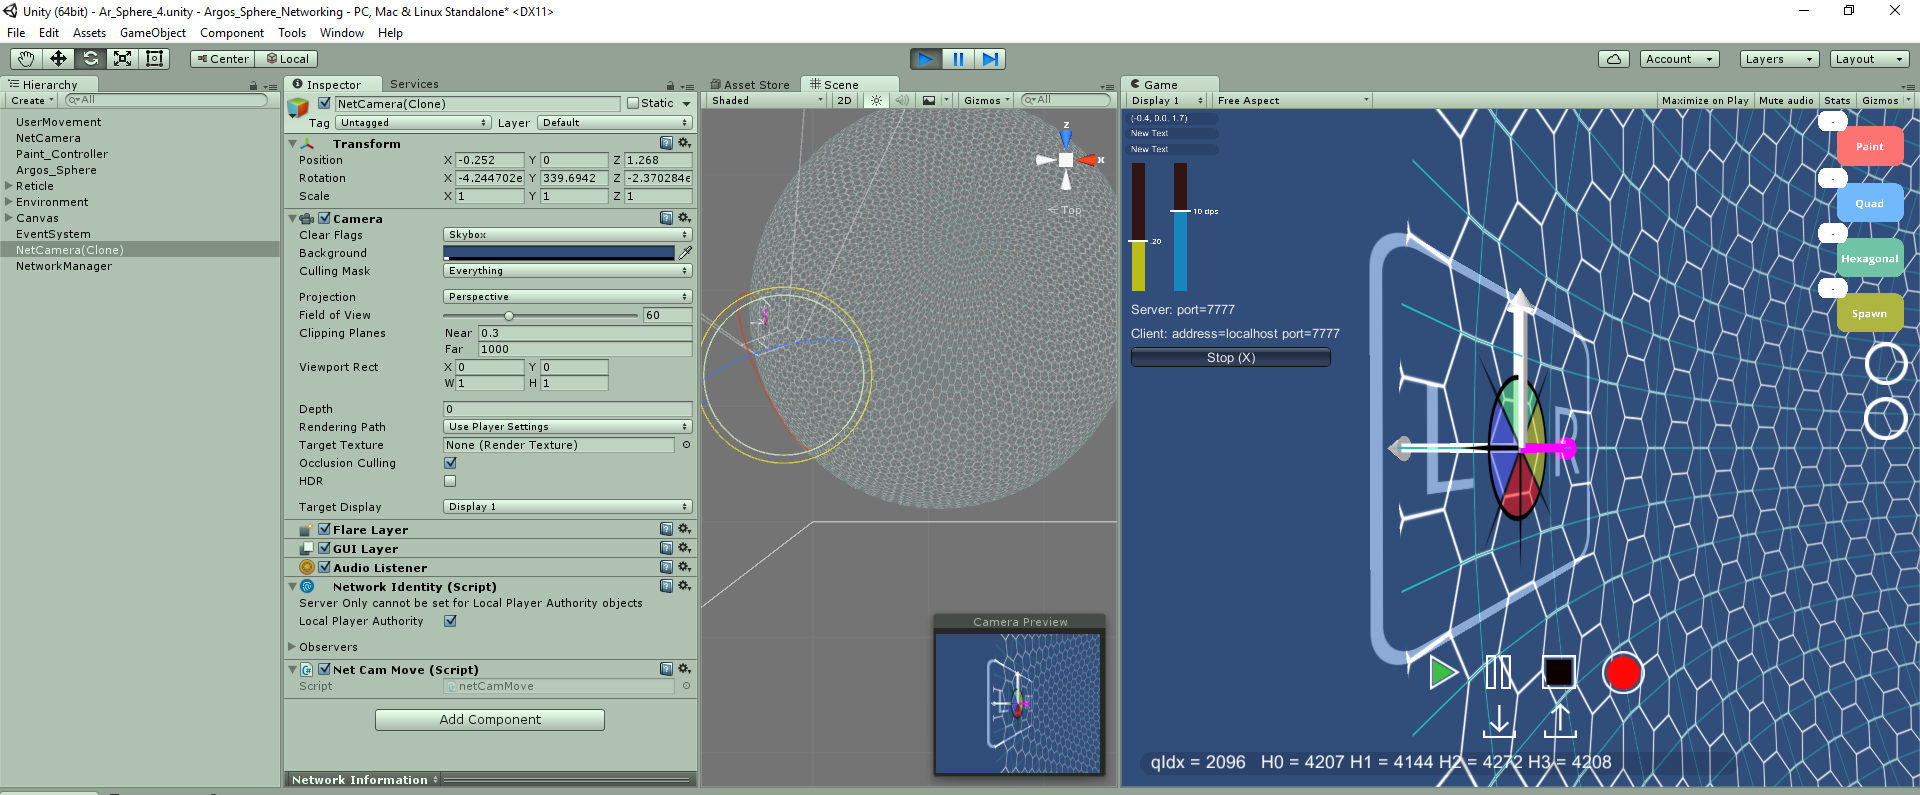
- Add the component Network -> NetworkIdentity to the object. This component is used to identify the object between the server and clients.
- Set the “Local Player Authority” checkbox on the NetworkIdentity to true. This will allow the client to control the movement of the player object
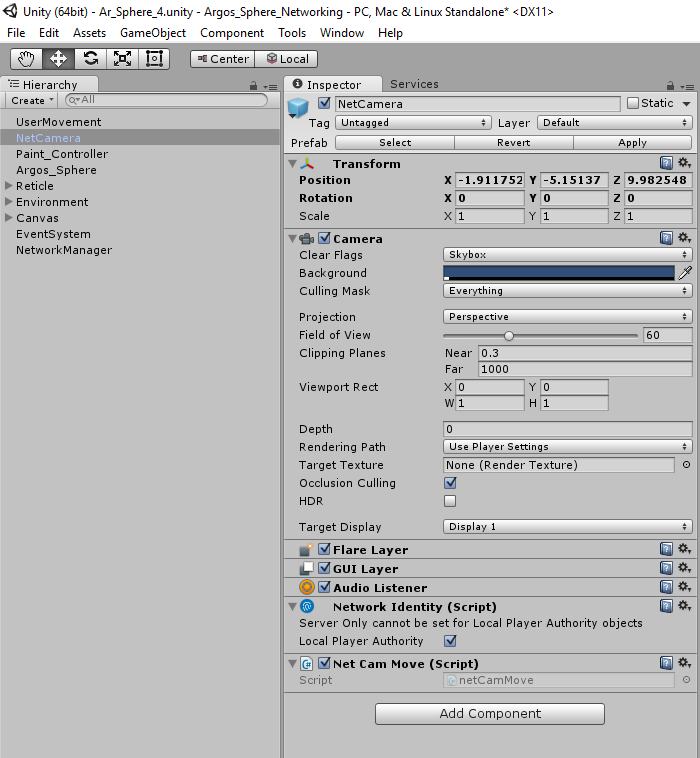
- Make a prefab from the NetCamera object by dragging it into the Argos_Prefabs. This will create a prefab called “NetCamera”
- Delete the NetCamera object from the scene – we don’t need it now that we have a prefab
See Player Objects.
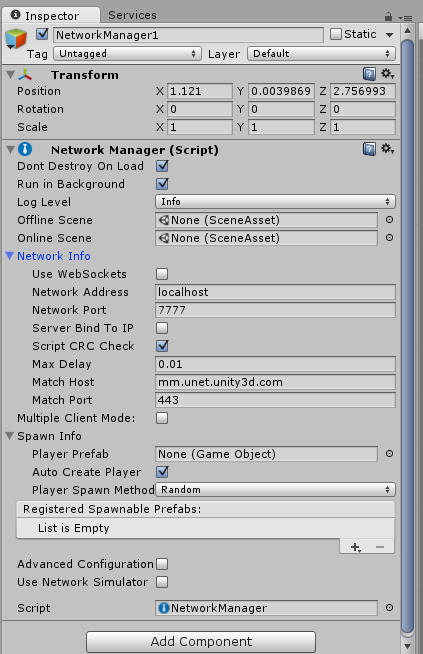
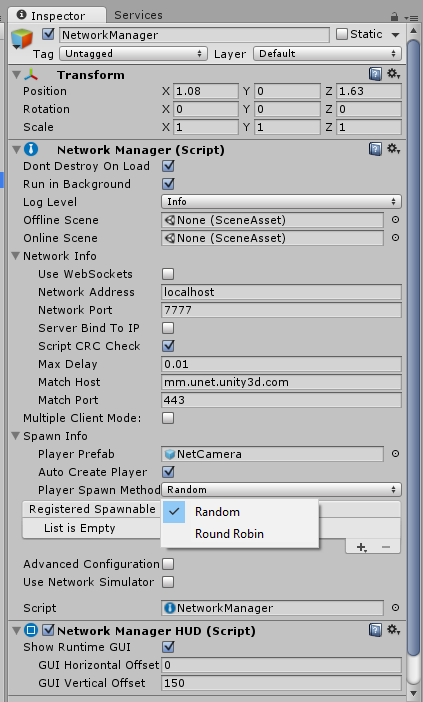
Register the Player Prefab
Once the player prefab is created, it must be registered with the network system.
- Find the NetworkManager object in the Heirarchy View and select it
- Open the “Spawn Info” foldout of the inspector for the NetworkManager
- Find the “Player Prefab” slot
- Drag the NetCamera prefab into the “Player Prefab” slot
Player (Camera) Movement (Single Player Version)
The first piece of game functionality is to move the player object. This will first be done without any networking, so it will only work in a single-player mode.
- Find the NetCamera prefab in the Asset view.
- Click the Add Component button and choose “New Script”
- Enter the name “NetCamMove” for the new script name. A new script will be created.
- Open this new script in Visual Studio by double clicking it
- Add this simple movement code to the script:
using UnityEngine;

public class NetCamMove : MonoBehaviour
{
    void Update()
    {
        var x = Input.GetAxis("Horizontal")*0.1f;
        var y = Input.GetAxis("Vertical")*0.1f;

        transform.Translate(x, y, 0);
    }
}
This hooks up the cube to be controlled by the arrow keys or a controller pad. The cmaera only moves on the client right now – it is not networked.
Save the project again.
Test a Hosted Session
Enter play mode in the editor by clicking the play button. You should see the NetworkManagerHUD default user interface:
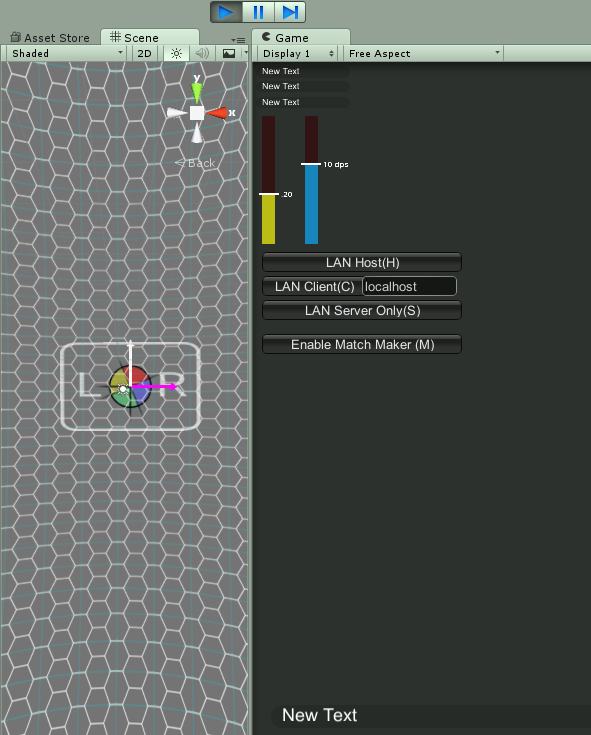
Press “Host” to start the game as the host of the game. This will cause a netCamera object to be created, and the HUD will change to show the server is active. This game is running as a “host” – which is a server and a client in the same process.
See Network Concepts.
Pressing the arrow keys should make the netCamera object move around.
Exit play mode by pressing the stop button in the editor.
Test Player Movement for a Client
- Use the menu File -> Build Settings to open the Build Settings dialog.
- Add the current scene to the build by pressing the “Add Open Scenes” button
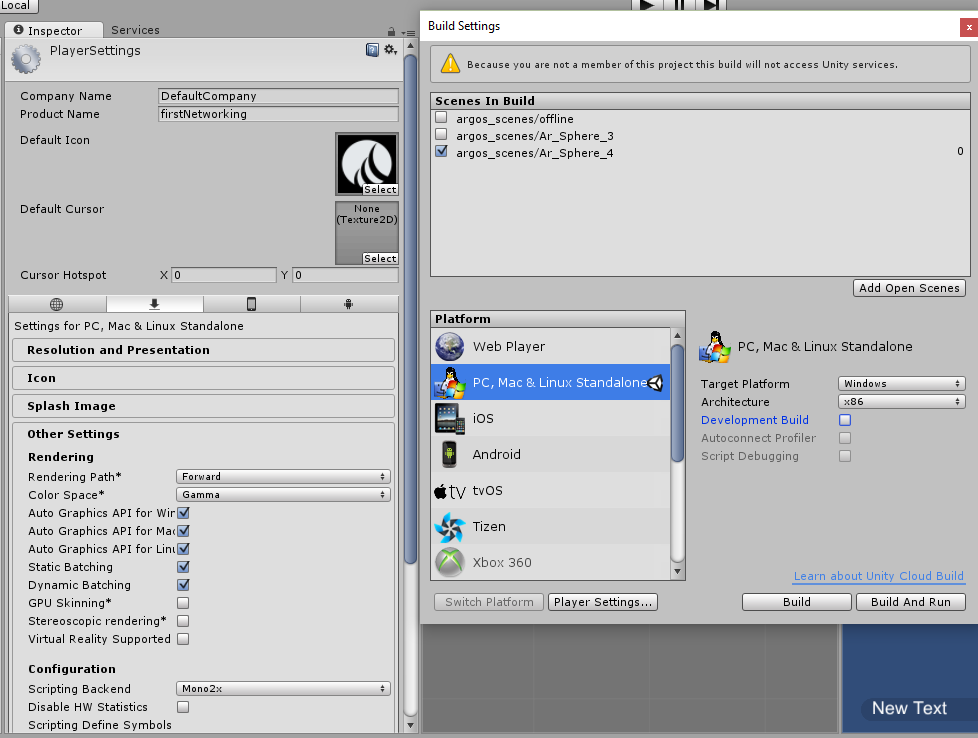
- Create a build by pressing the “Build and Run” button. This will prompt for a name for the executable, enter a name such as “networkTest”
- A stand-alone player will launch, and show a resolution choice dialogue.
- Choose the “windowed” checkbox and a lower resolution such as 640×480
- The stand-alone player will start and show the NetworkManager HUD.
- Choose “Host” from the menu to start as a host. A player cube should be created
- Press the arrow keys to move the player cube around a little
- Switch back to the editor and close the Build Settings dialog.
- Enter play mode with the play button
- From the NetworkManagerHUD user interace, choose “LAN Client” to connect to the host as a client
- There should be two cubes, one for the local player on the host and one for the remote player for this client
- Press the arrow keys to move the cube around
- Both cube currently move! -No- This because the movement script is not network-aware.
Make Player Movement Networked
- Close the stand-alone player
- Exit play mode in the editor
- Open the PlayerMove script.
- Update the script to only move the local player
- Add “using UnityEngine.Networking”
- Change “MonoBehaviour” to “NetworkBehaviour”
- Add a check for “isLocalPlayer” in the Update function, so that only the local player processes input
using UnityEngine;
using System.Collections;
using UnityEngine.Networking;

public class netCamMove : NetworkBehaviour
{
    void Start ()
    {

    }

    void Update()
    {
        if (!isLocalPlayer)
                return;

        var x = Input.GetAxis("Horizontal") * 0.01f;
        var y = Input.GetAxis("Vertical") * 0.01f;

        transform.Translate(x, y, 0);
    }
}
- Find the NetCamera prefab in the Asset View and select
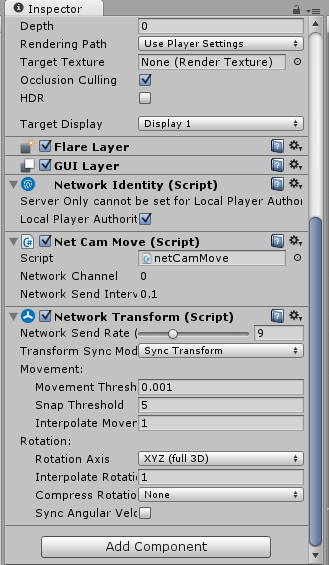
- Click the “Add Component” button and add the Networking -> NetworkTransform component. This component makes the object synchronize it’s position across the network.
Test Multiplayer Movement
- Build and run the stand-alone player again and start as host
- Enter play mode in the editor and connect as a client
- The player objects should now move independently of each other, and are controlled by the local player on their client.
Identify Your Player
The cubes in the game are currently all white, so the user cannot tell which one is their cube. To identify the player, we will make the cube of the local player red.
- Open the PlayerMove script
- Add an implementation of the OnStartLocalPlayer function to change the player object
    public override void OnStartLocalPlayer()
    {
        aCam = GameObject.Find("Argos_Camera");
        aCam.transform.parent = this.transform;
        this.name = "ArgosNet_Local";
    }
The OnStartLocalPlayer function is a good place to do initialization that is only for the local player, such as configuring cameras and input.