How to Set the Betaflight Flight Controller Parameters
For safety purpose, make sure that you have removed the drone propeller before setting the flight controller parameters.
First, we need to download the Betaflight configurator. You can read my previous post, which illustrates how to use the beta version Betaflight. The official version of configurator that supports the DJI HDL remote controller protocol is not yet available, so we need to use beta version or development version of the Betaflight to achieve the 7ms ultra-low delay.
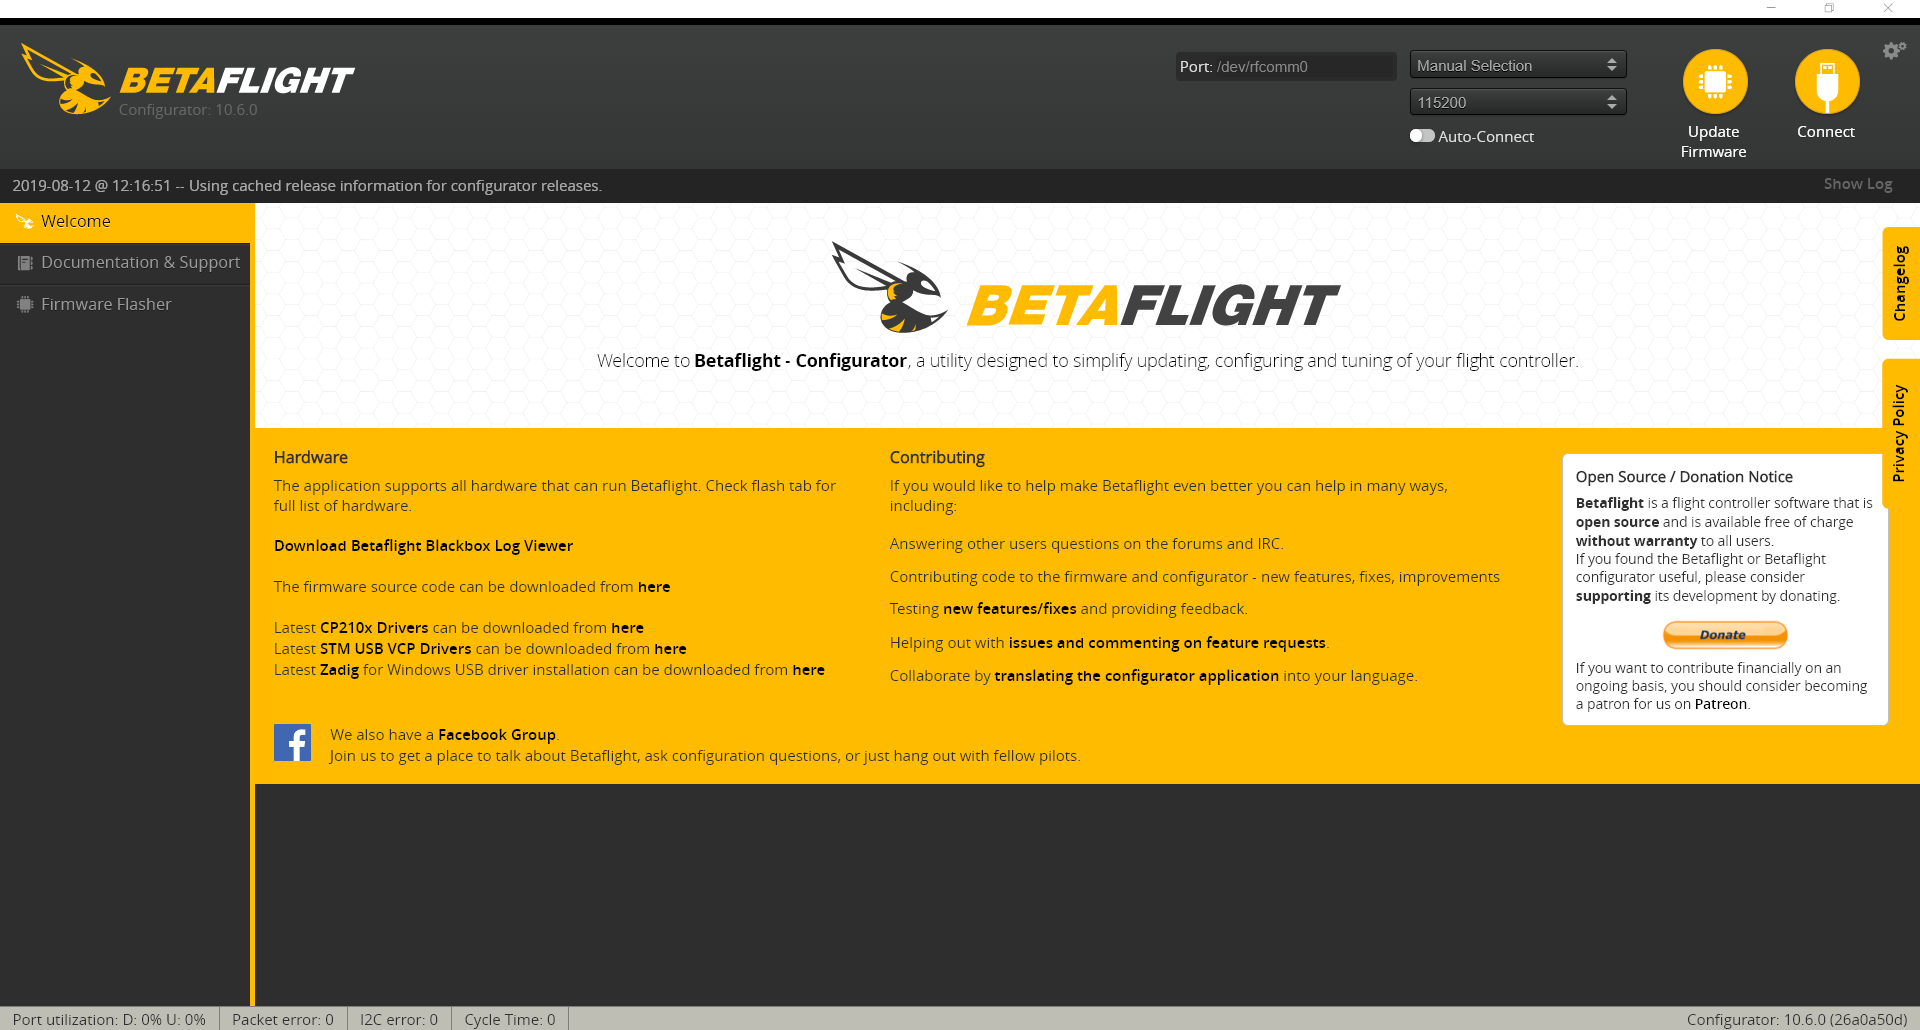
Launch the configurator. Here, I use the beta version of Betaflight configurator. Use a USB cable to connect the drone to the computer.
Ensure that you select the COM port corresponding to the flight controller in Betaflight configurator, and select 115,200 Baud rate.
I. How to Update the Flight Controller Firmware
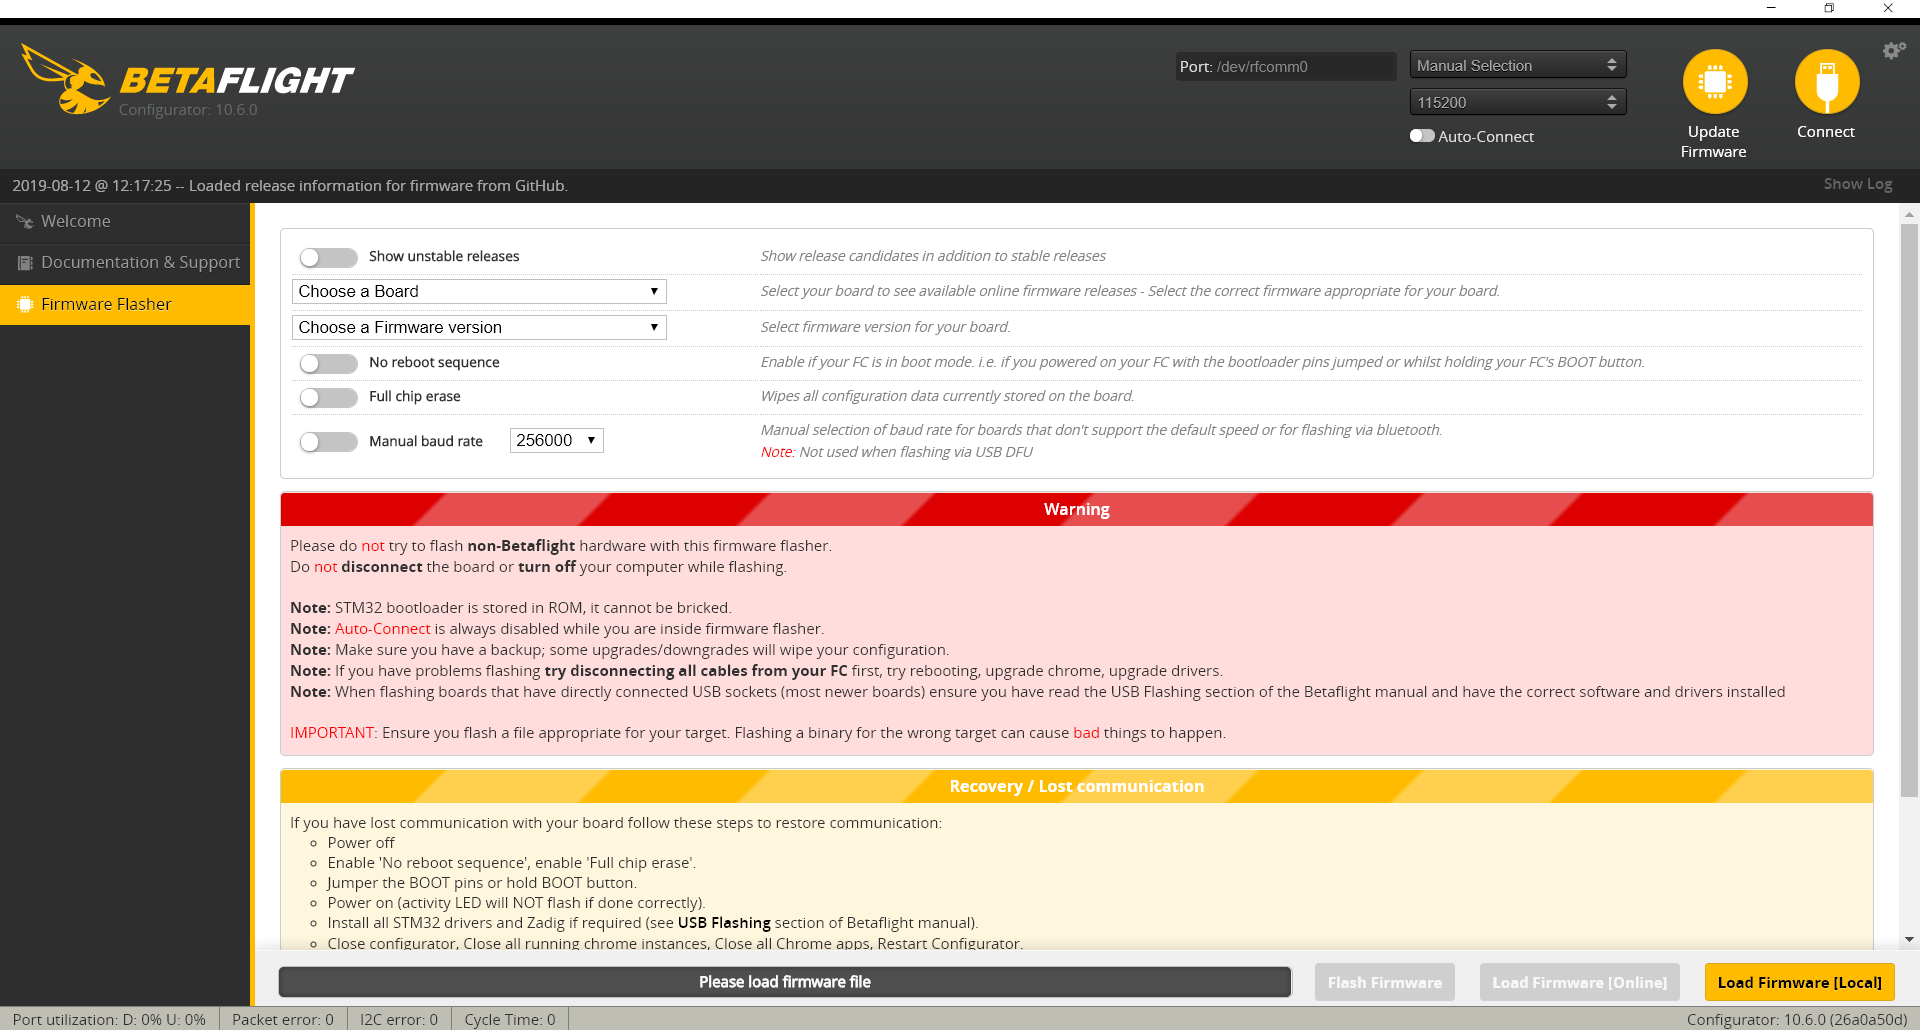
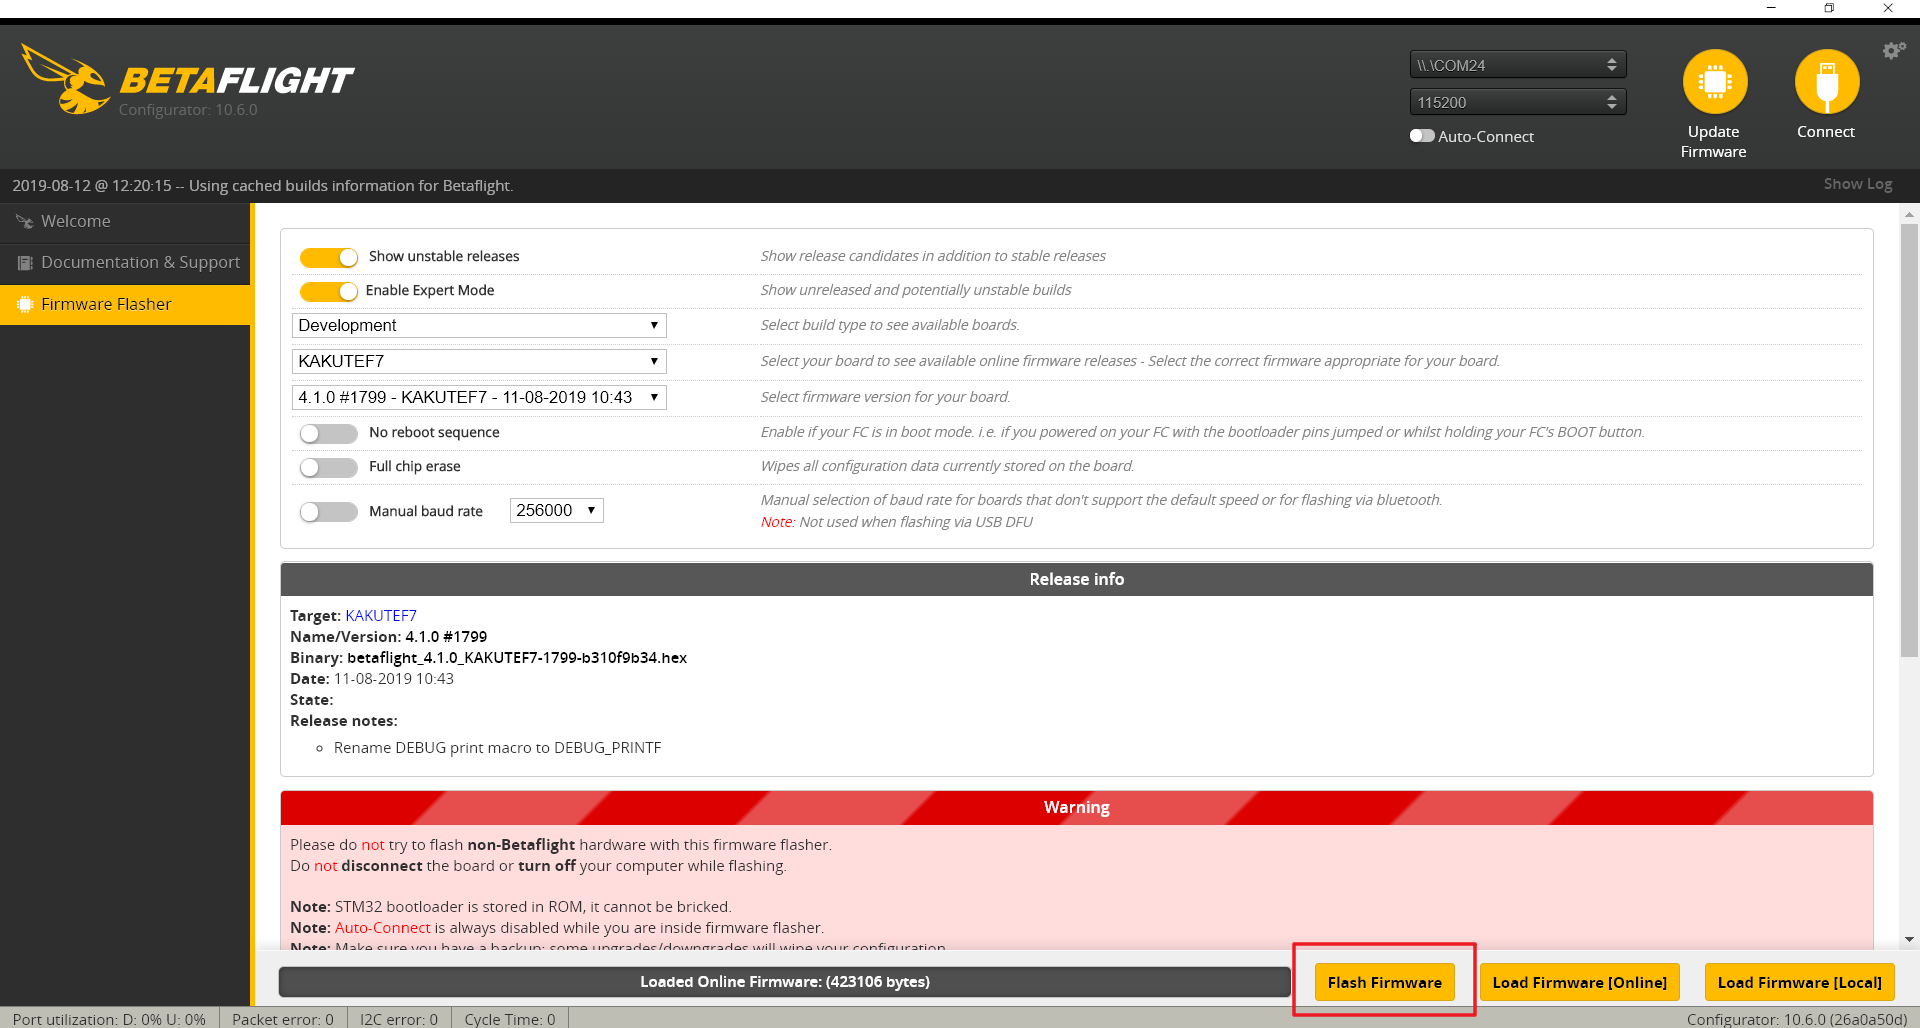
Click the “Firmware Flasher” page.
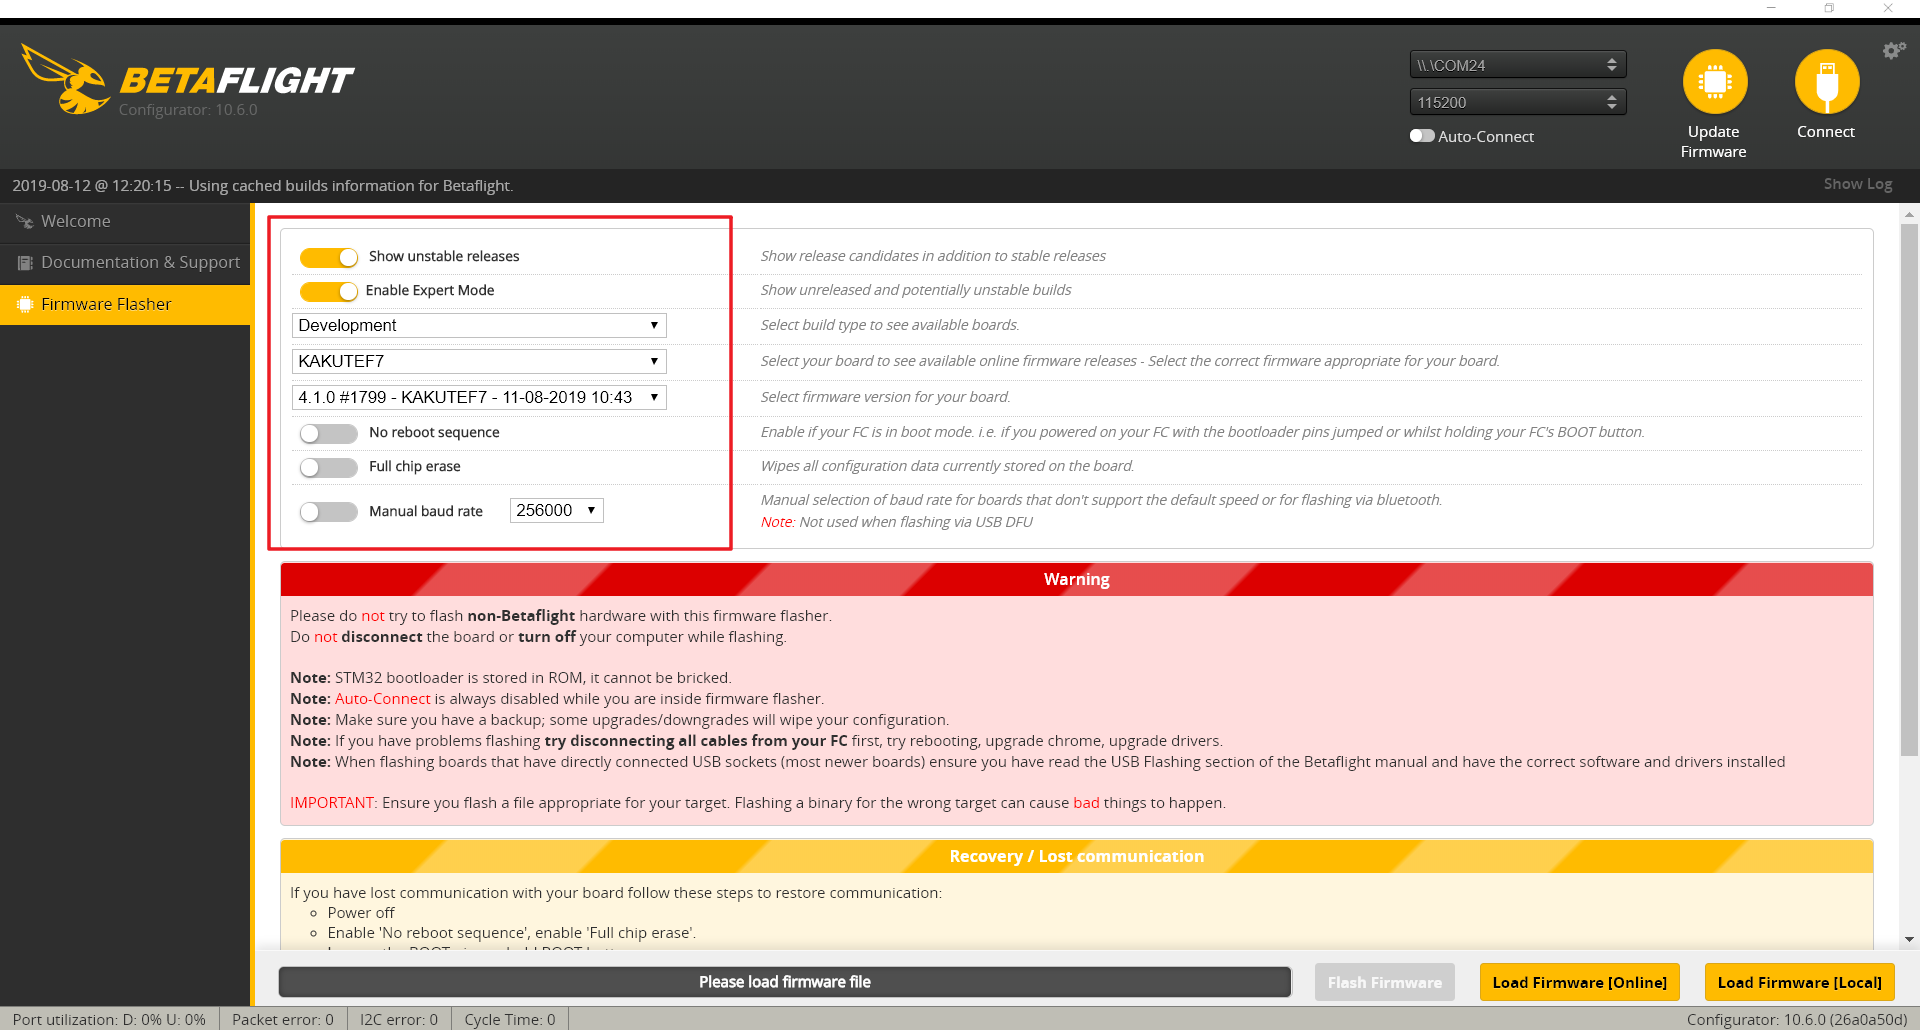
It should be noted that the flight controller firmware supporting DJI HDL must be version 4.1.0 or above, as mentioned in DJI tutorial video. If S.Bus is used, you can choose any firmware.
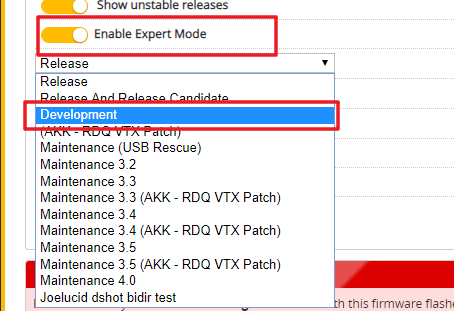
Therefore, when selecting the firmware, it is necessary to enable the Expert Mode. Then, select the “Development” as shown in the picture. Then, select your own flight controller and firmware with version above 4.1.0. If the official version 4.1.0 of firmware is released later, you may not select the development firmware. Stability is relatively important.
Click “Load Firmware [Online]” button on the right bottom.
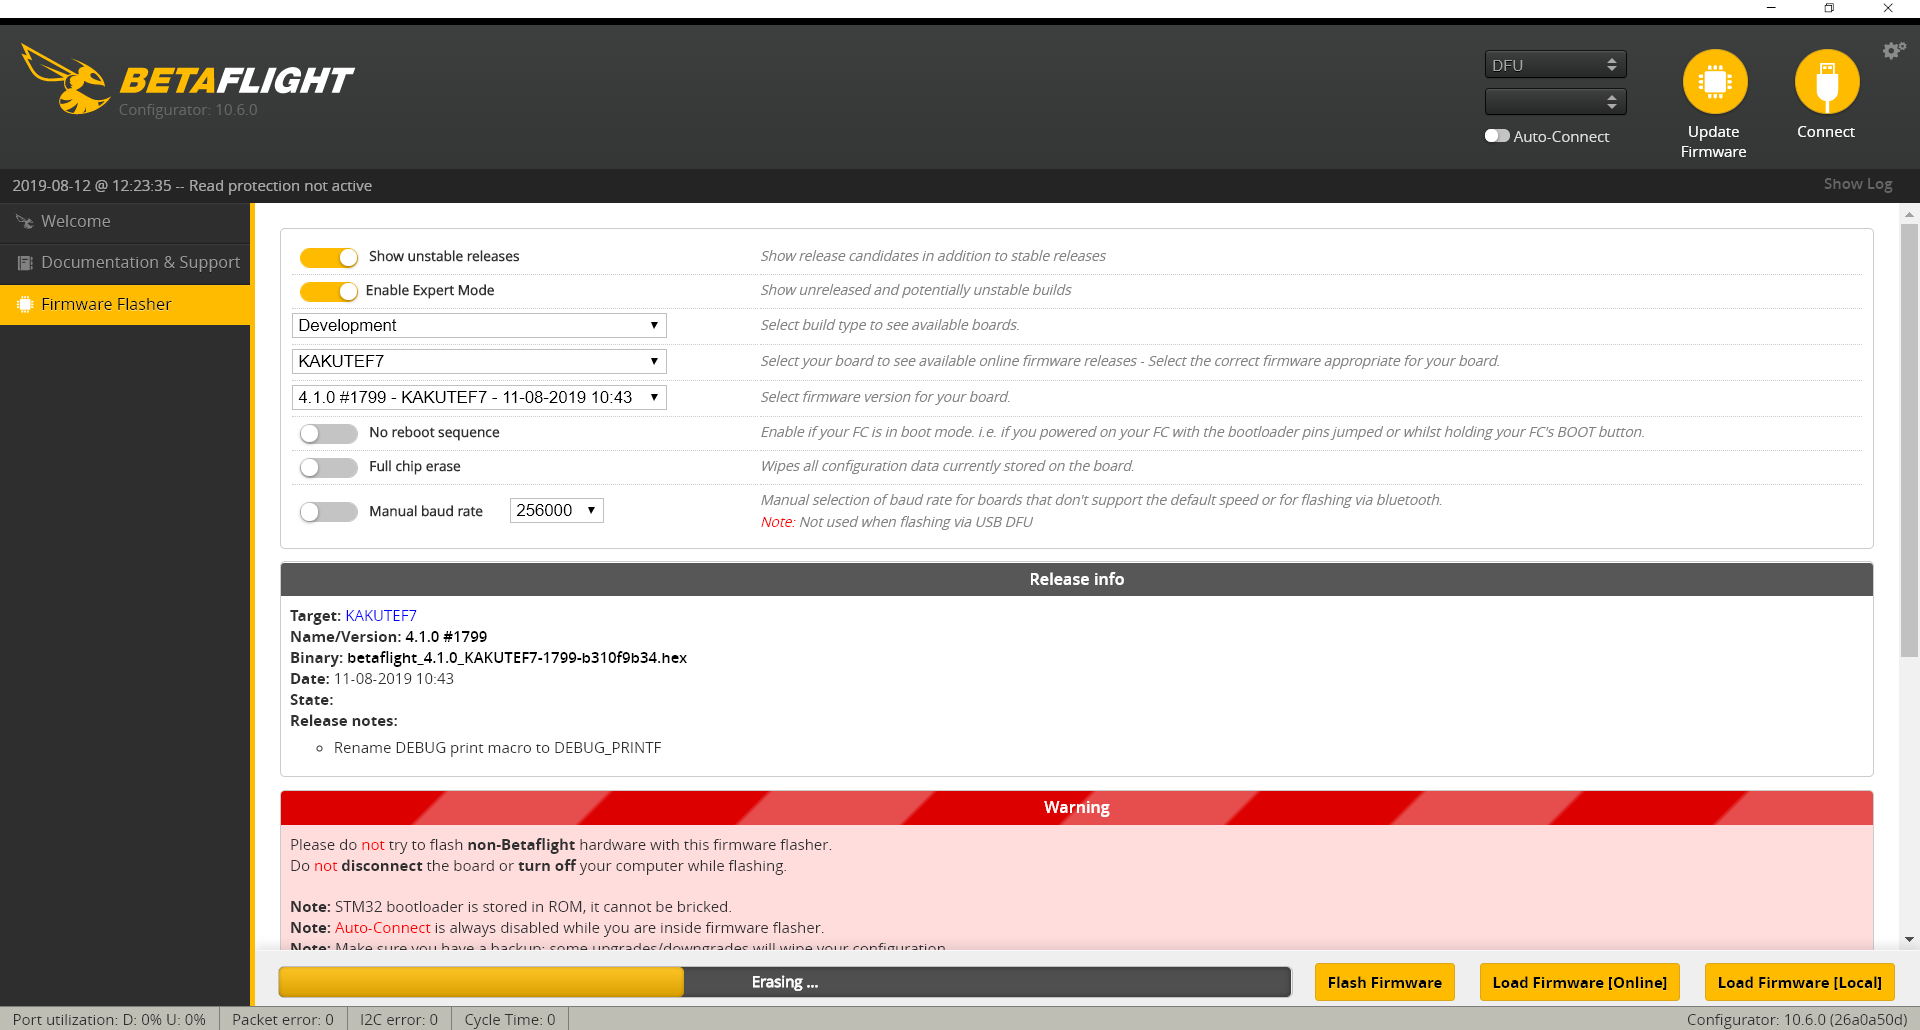
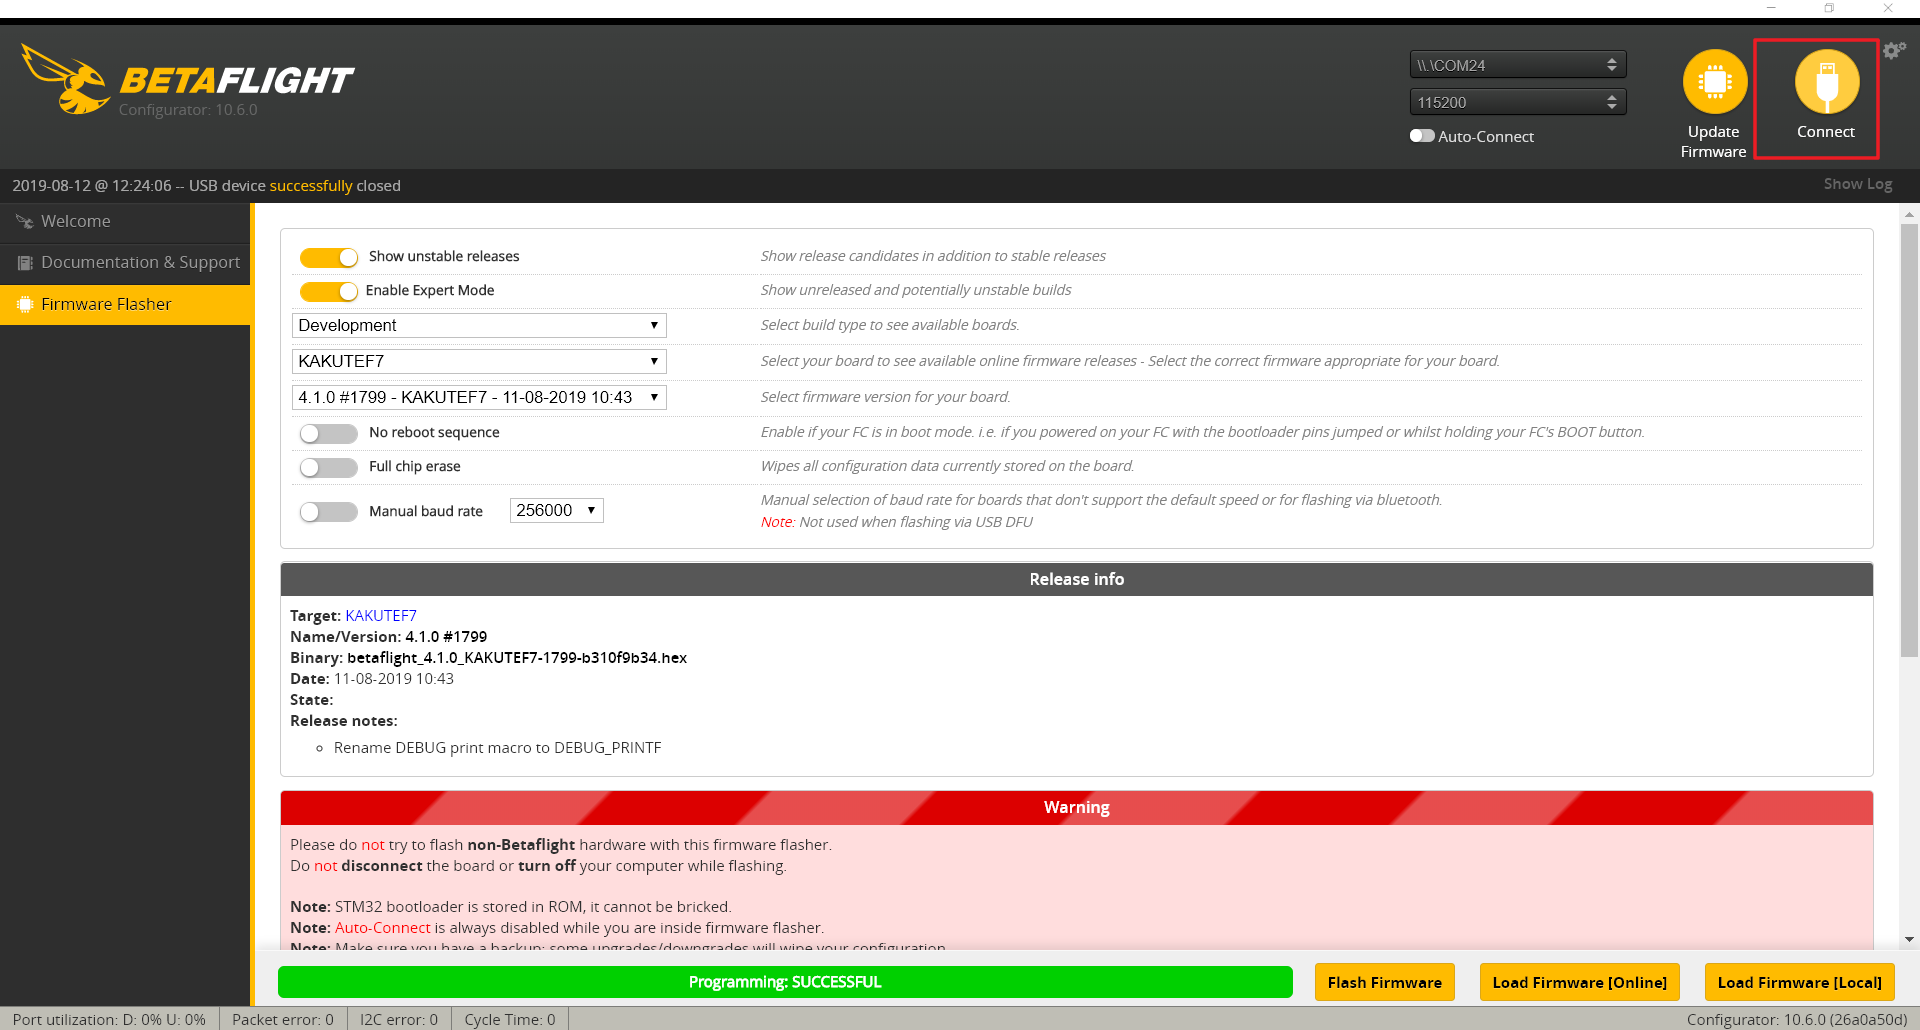
After the firmware is downloaded, click “Flash Firmware” and wait until the firmware flashing is completed.
II. How to Set Various Flight Controller Parameters
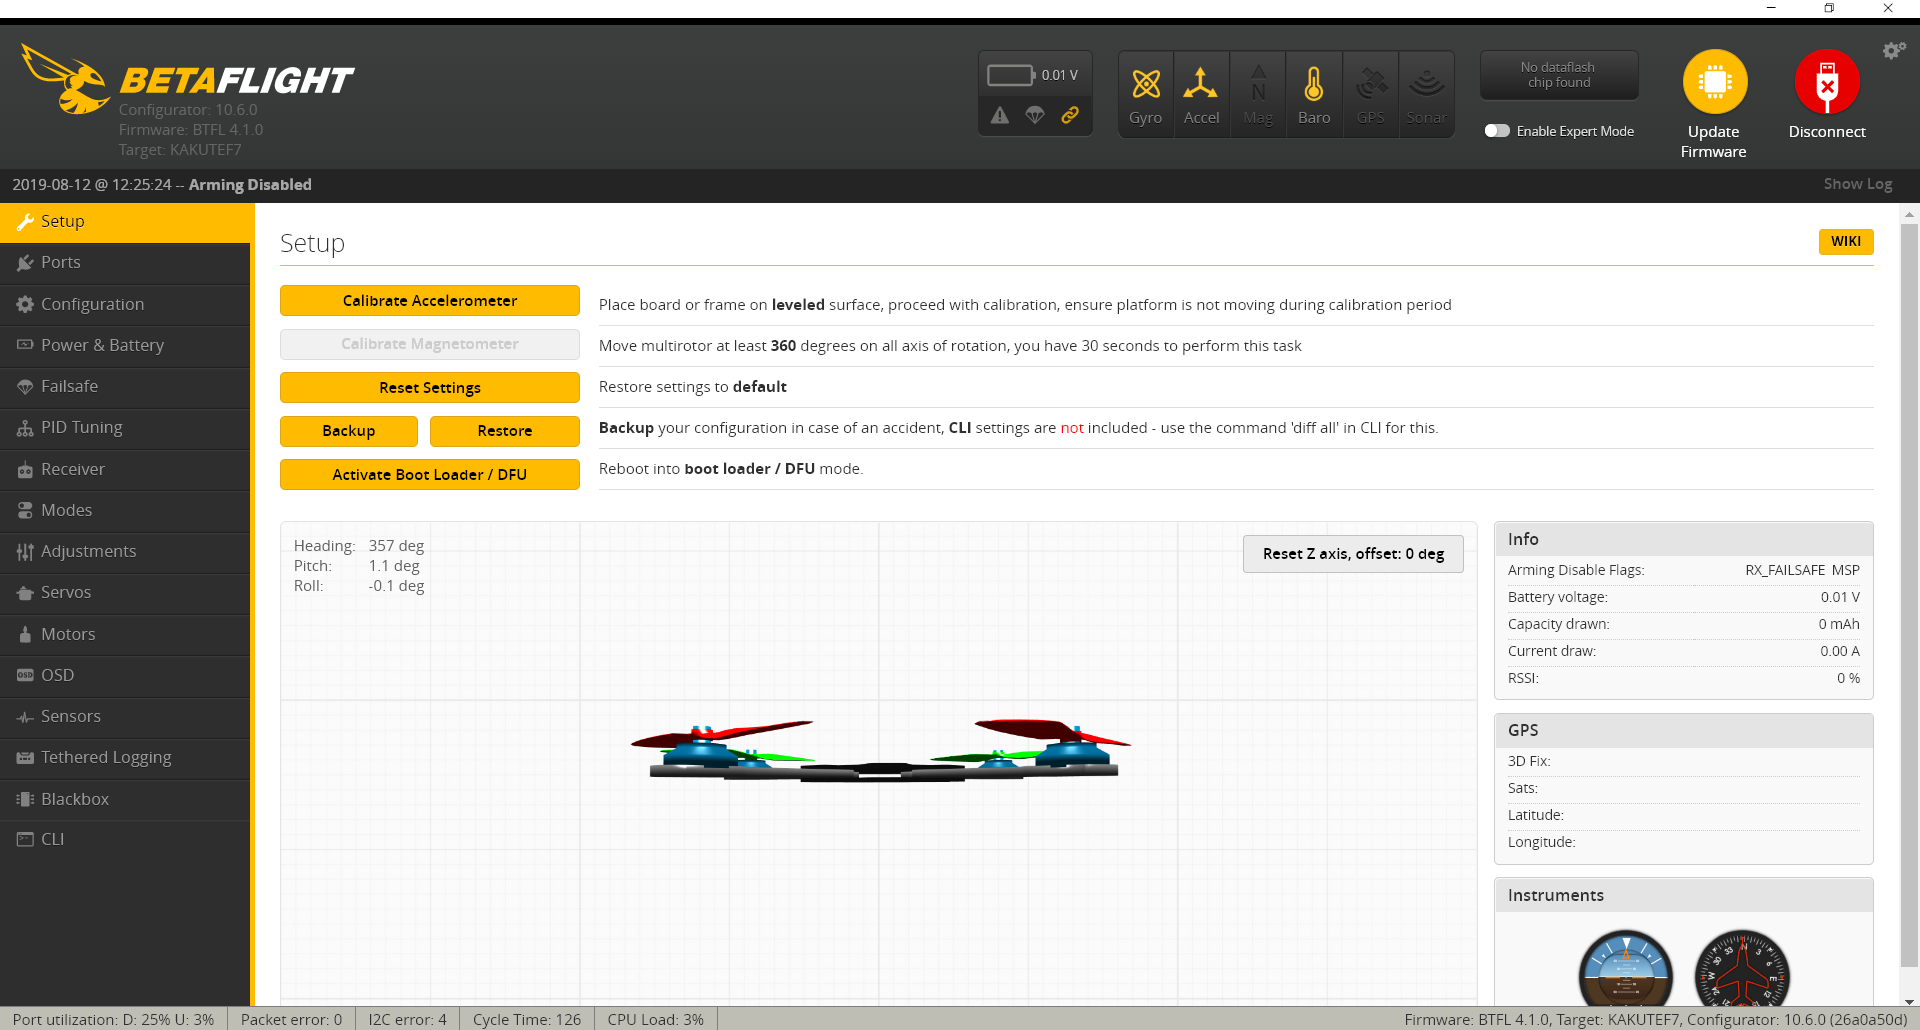
After the firmware is updated, click the “Connect” button on the right top to enter the Setting page of the flight controller.
Check whether the attitude and direction displayed on the page are consistent with the actual attitude and direction of the flight controller. If not, check the installation direction of the flight controller, and calibrate the accelerometer.
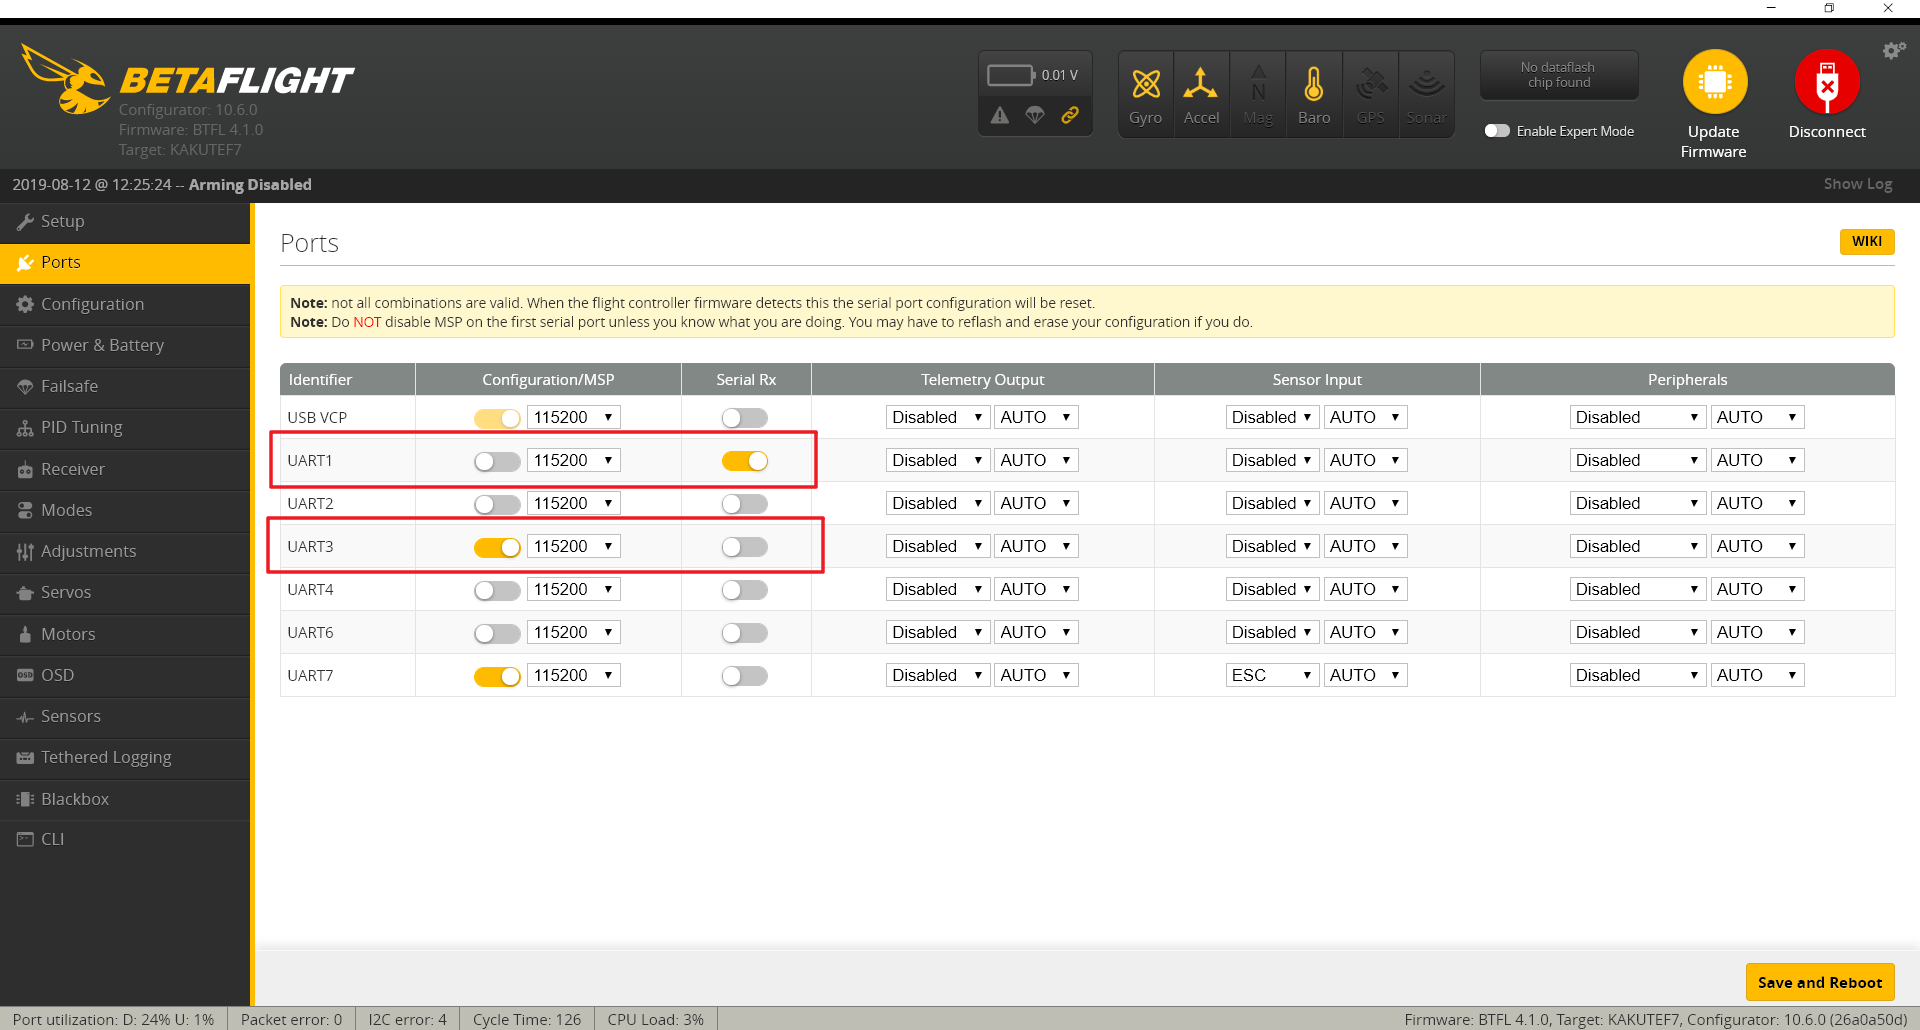
Enter the “Ports” page. Pay special attention to your welding. Most S.Bus interface and uart1 of the flight controller are connected to one serial port. If you have welded the receiver to the S.Bus and GND ports, make sure that you do not use UART1.
You’d better weld the OSD RX on TX3, and OSD TX on RX3 to avoid other problems.
Based on your wiring, start the UART1 serial digital receiver. Start the UART3 setting switch, and select 115,200 Baud rate.
Click Save and reboot the flight controller.
Before setting other parameters, select the remote controller protocol of the Air Unit.
In the FPV Goggles setting menu, enter the device, and set the receiver protocol. Select DJI HDL or S.Bus protocol as required.
HDL is capable of 7 ms rapid response, while S.Bus is more general and easy-to-use. Choose the one you prefer.
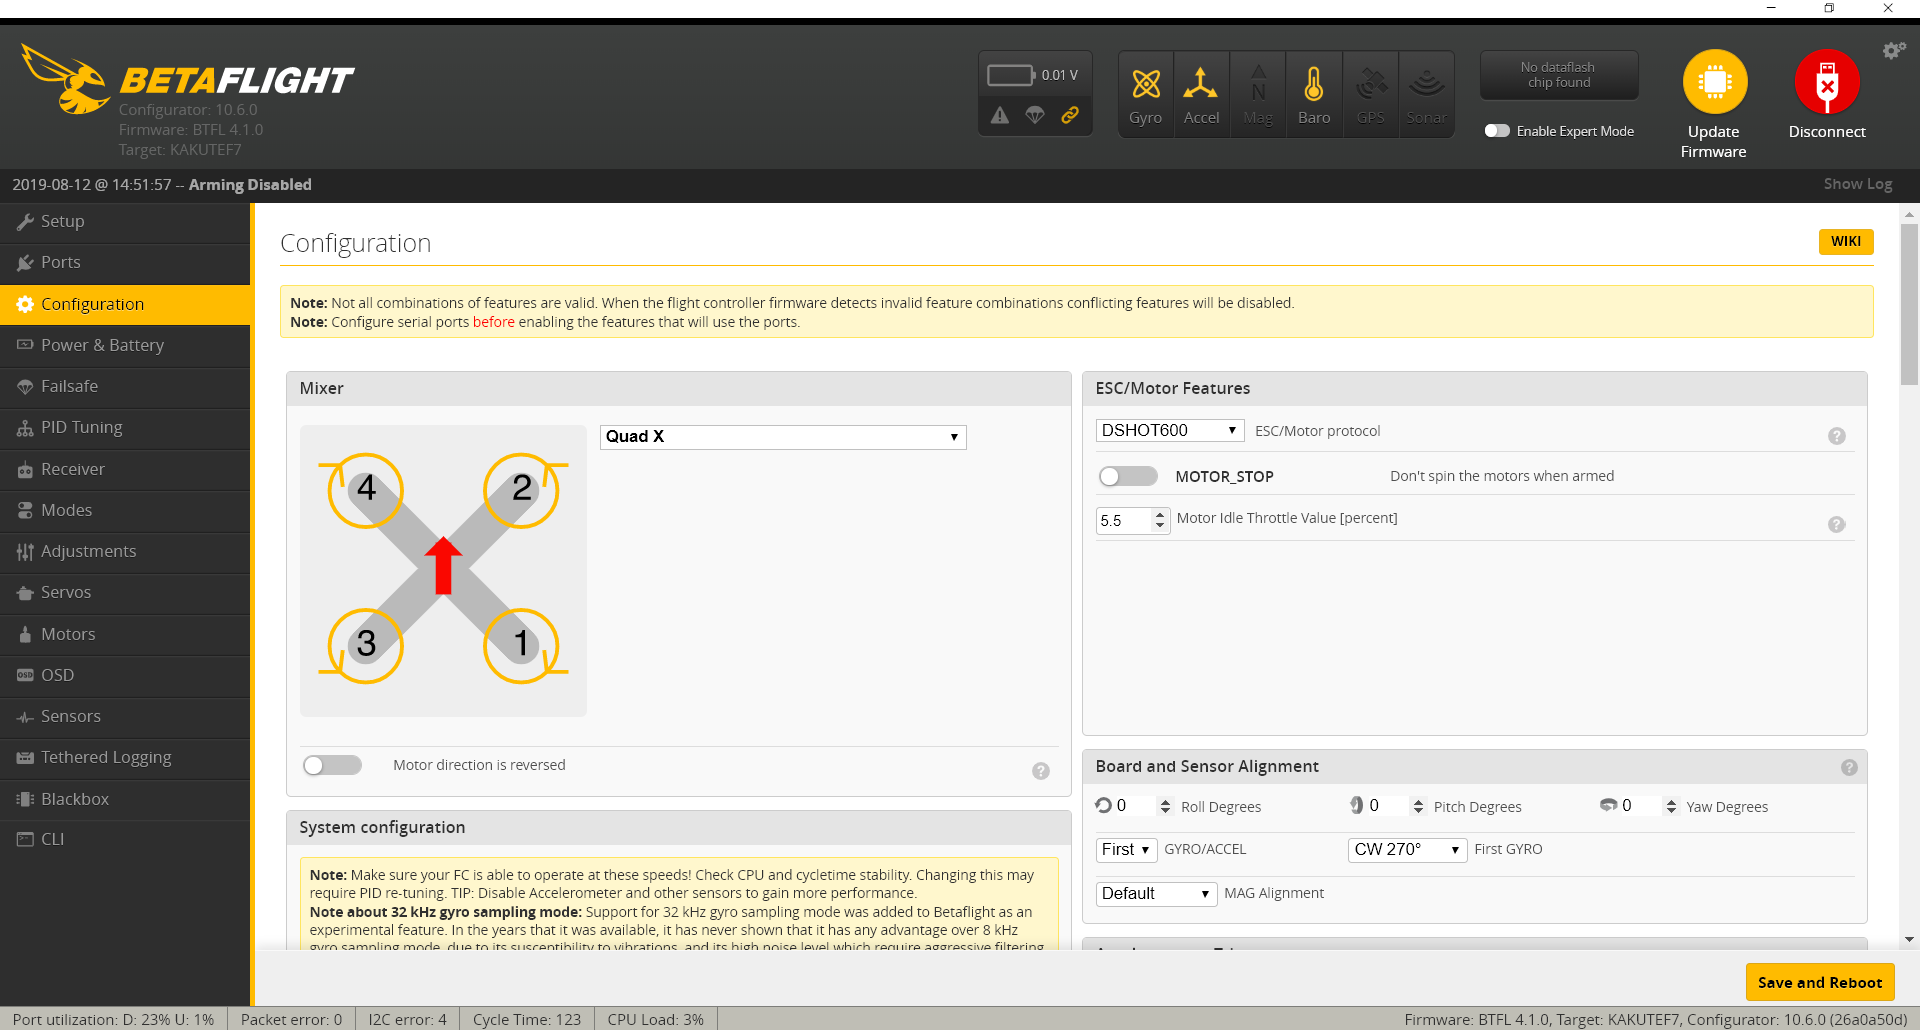
Restart the flight controller, and click the “Connect” button on the right top to enter the configuration page.
On this page, select the protocol supported by ESC.
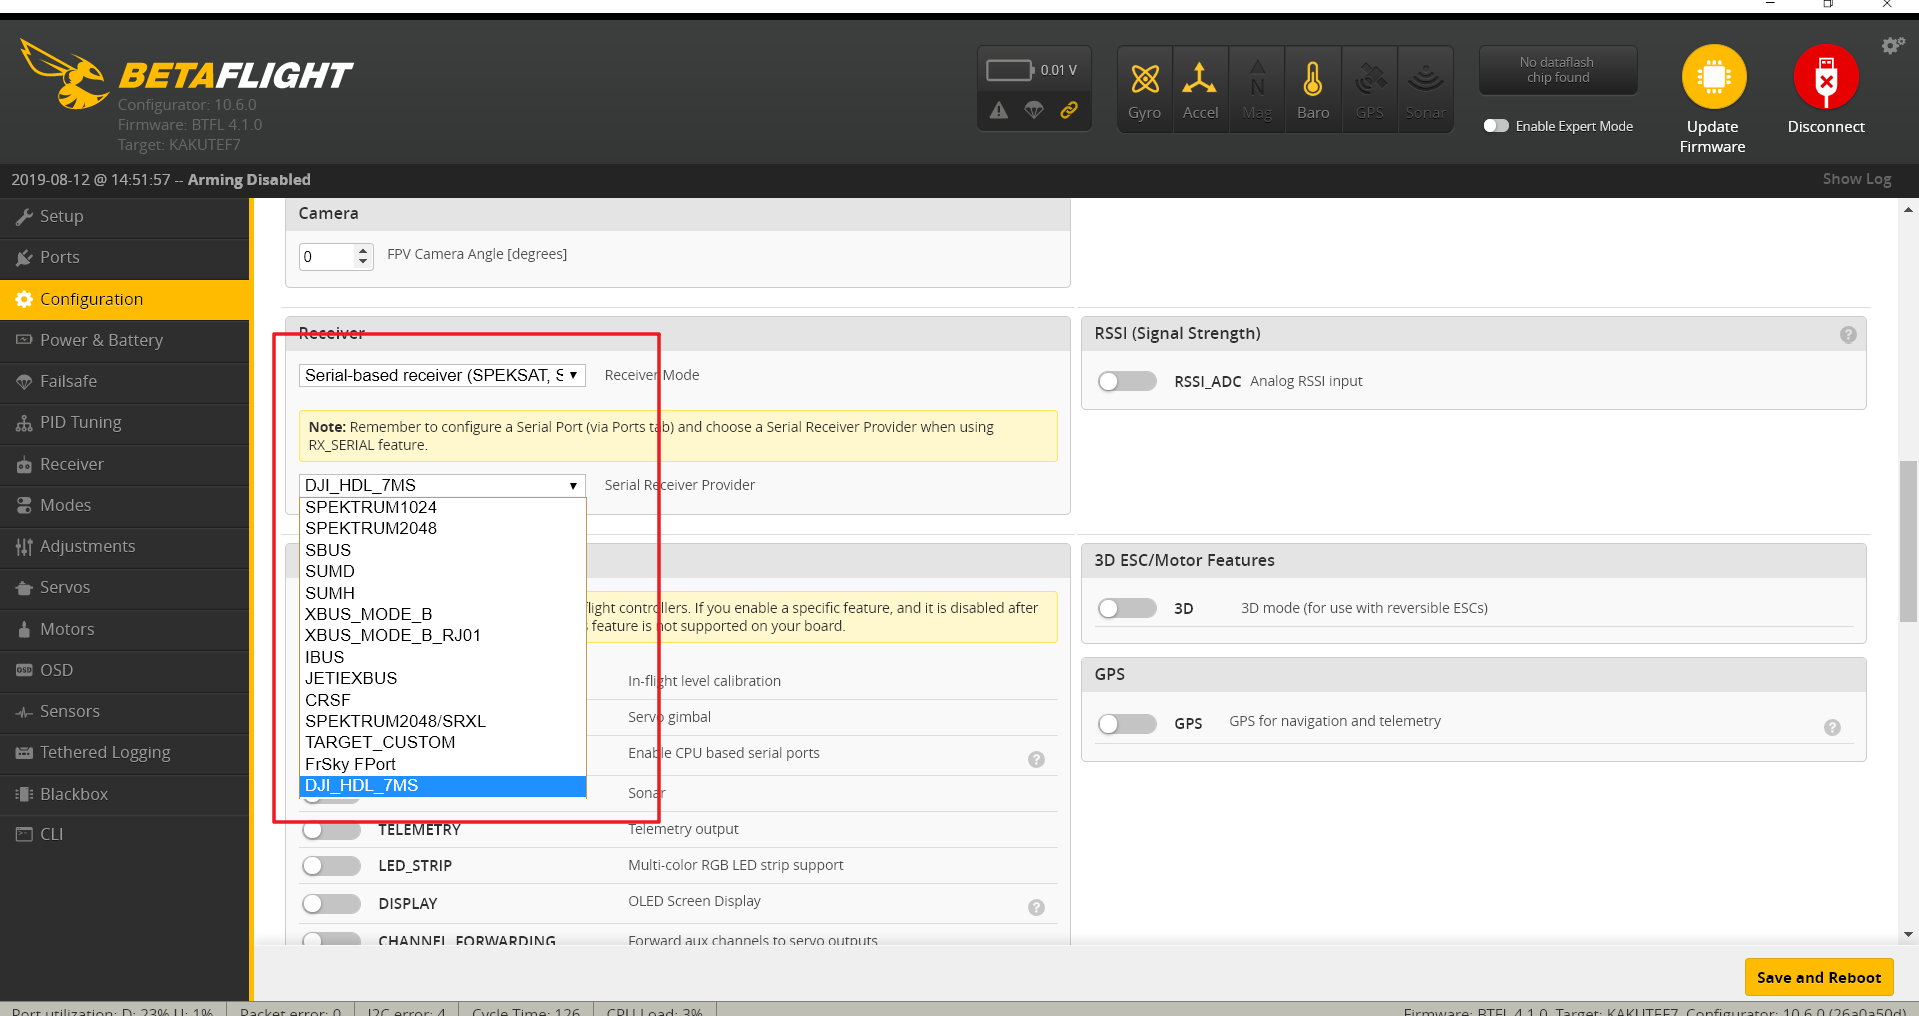
Then, select the receiver mode as serial-based receiver, and select serial digital receiver protocol as DJI_HDL_7MS or S.Bus, which must be consistent with the previous FPV Goggles protocol setting. Click Save and reboot the flight controller.
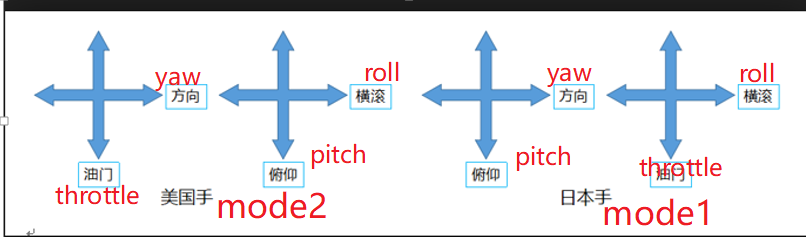
Before setting the receiver parameters, set the DJI FPV remote controller’s stick mode.
Enter the “Stick Mode” page.
Mode 2 and Mode 1 are available for the remote controller. Set the corresponding stick mode based on your version.
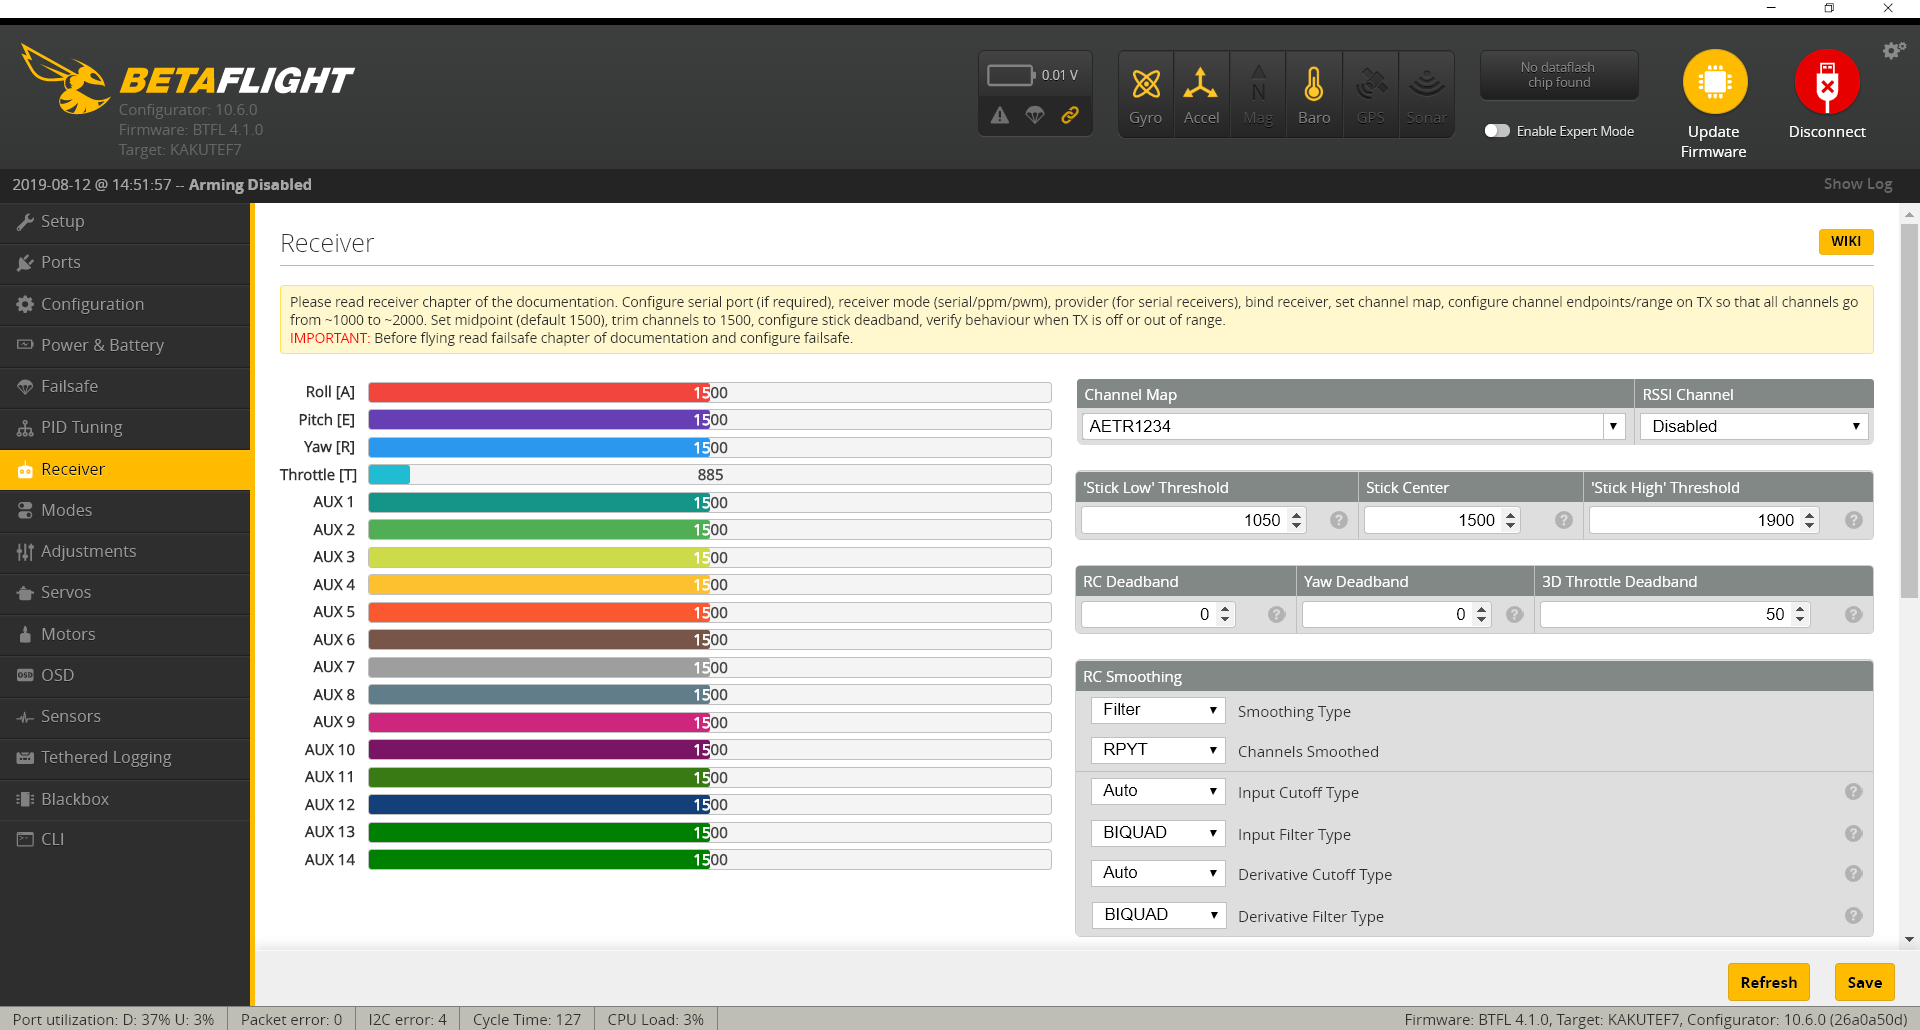
Restart the flight controller, and click the “Connect” button on the right top, and enter the receiver page.
If the above installation and setting steps are correct, you can see how much the stick is pushed away from the center position on this page, which changes as you move the remote controller stick.
Meanwhile, please check whether the control output in Betaflight is consistent with the actual control mode of the remote controller (Mode 2 / Mode 1) on this page.
After setting the receiver, we can set the switch function.
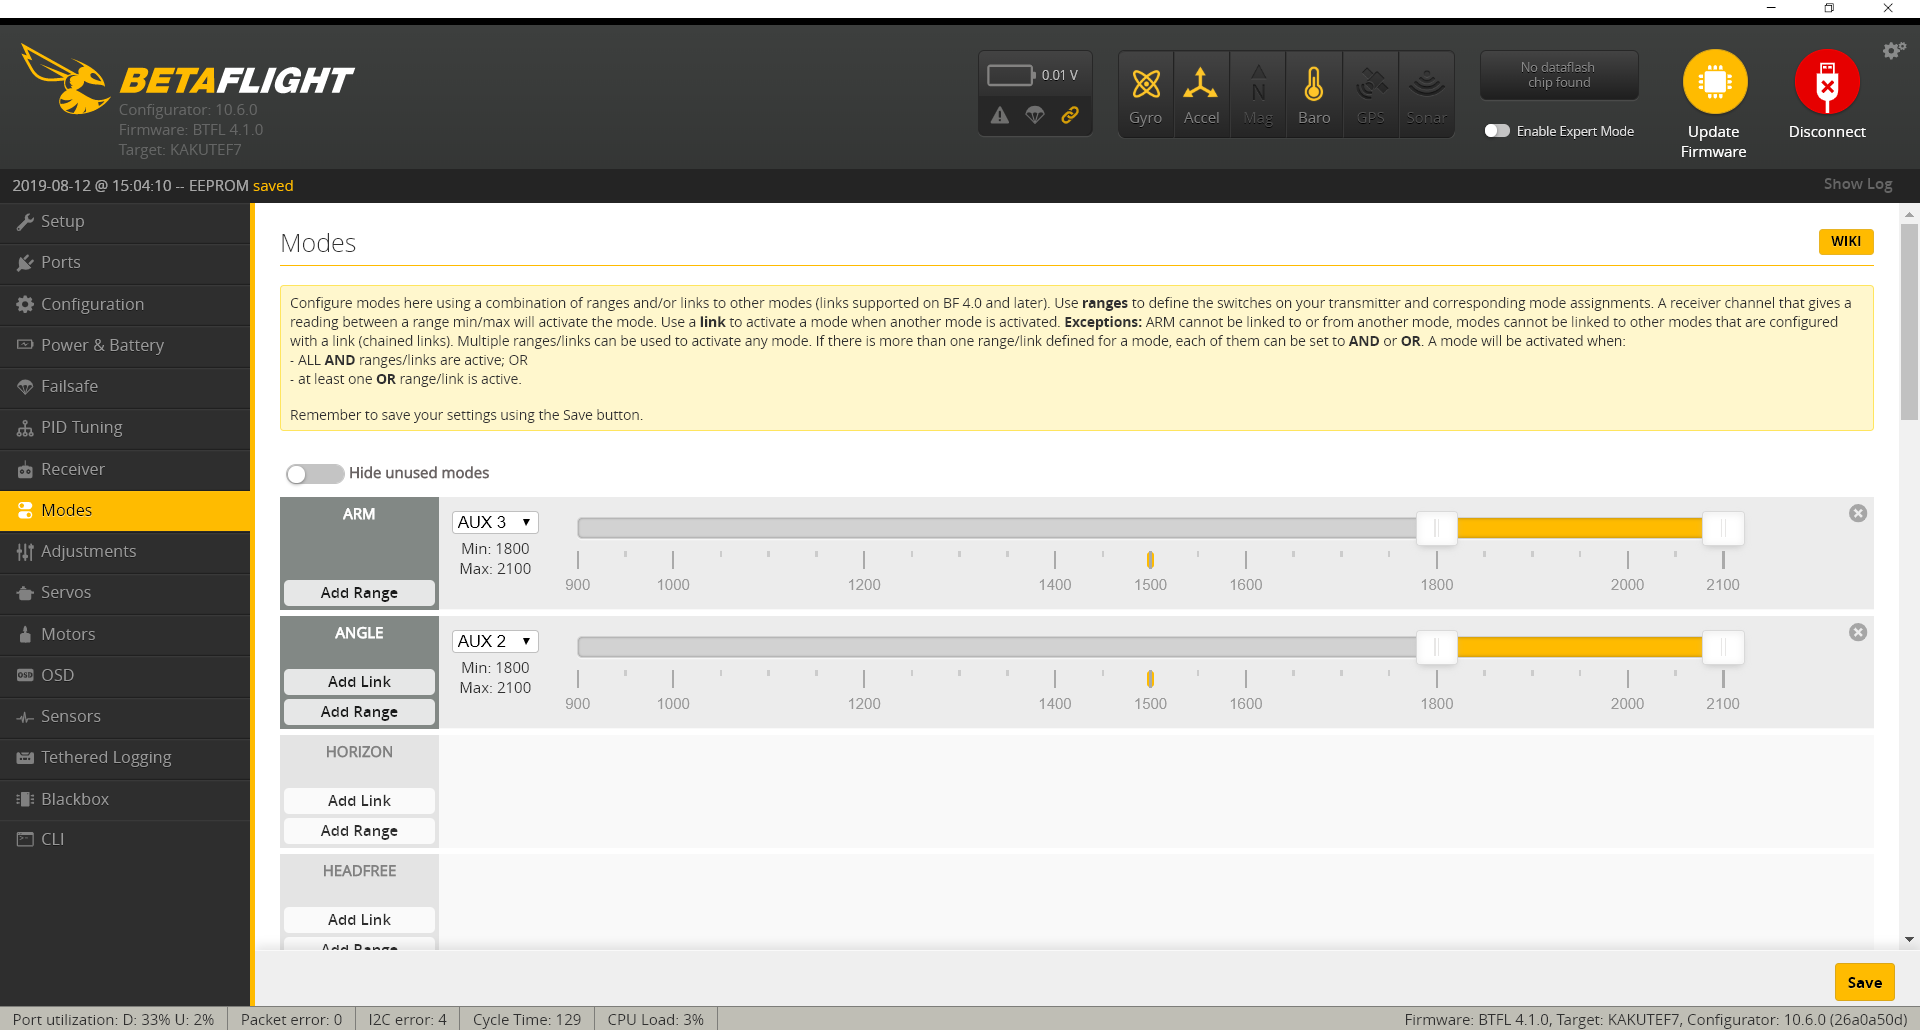
In Betaflight’s Modes page, you can map the remote controller’s switch and function. The settings recommended in DJI video tutorials are as follows:
Set ARM channel to AUX3, select the SC switch for Unlock mode’s switch, and move the orange control bar to 1,800-2,100. When the remote controller’s switch position is toggled to the orange area, i.e., the bottom area, the drone will unlock and the motor will start rotation.
Set ANGLE channel to AUX2, select SA switch for Angle mode’s switch, and move the orange control bar to 1,800-2,100. When the remote controller’s switch position is toggled to the orange area, i.e. the bottom area the drone will enter the Angle mode, and keep the horizontal status.
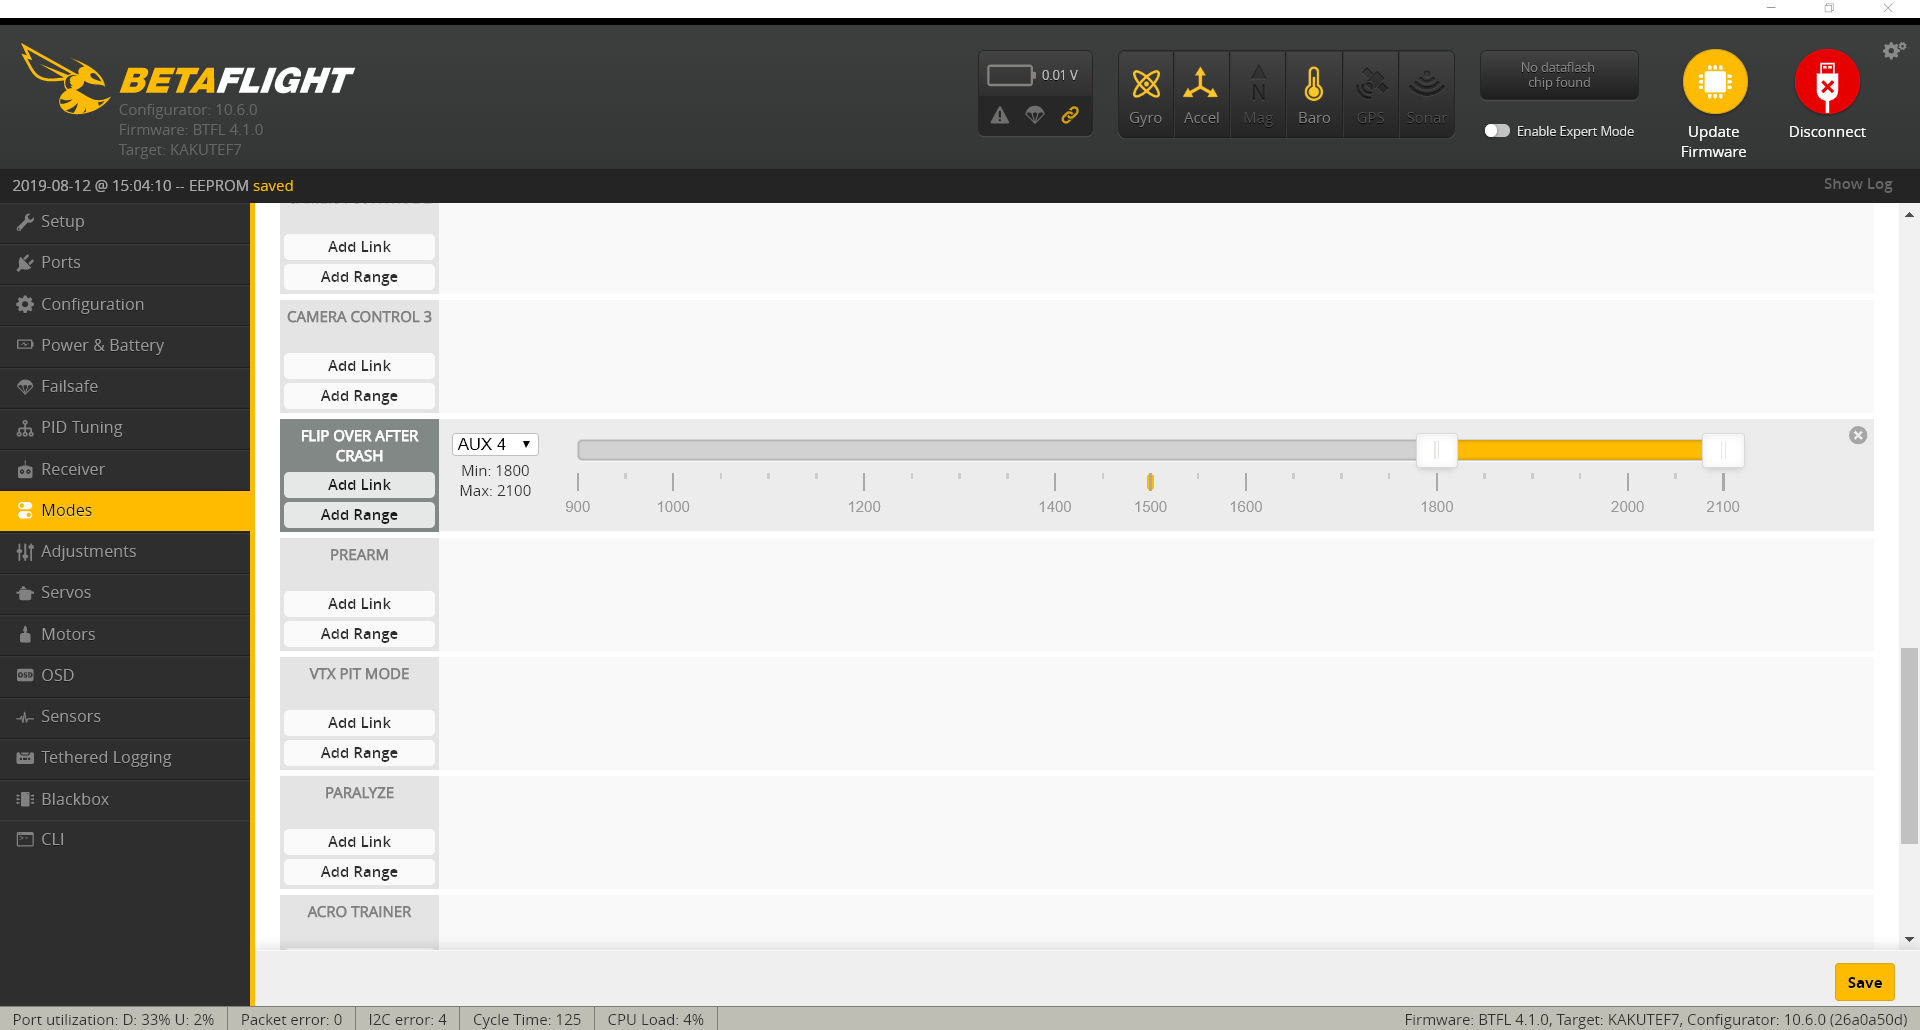
Set FLIP OVER AFTER CRASH channel to AUX1, and select the SB switch for FLIP OVER mode, and move the orange control bar to 1,800-2,100.
Of course, these are recommended configurations. You can choose the ones you prefer.
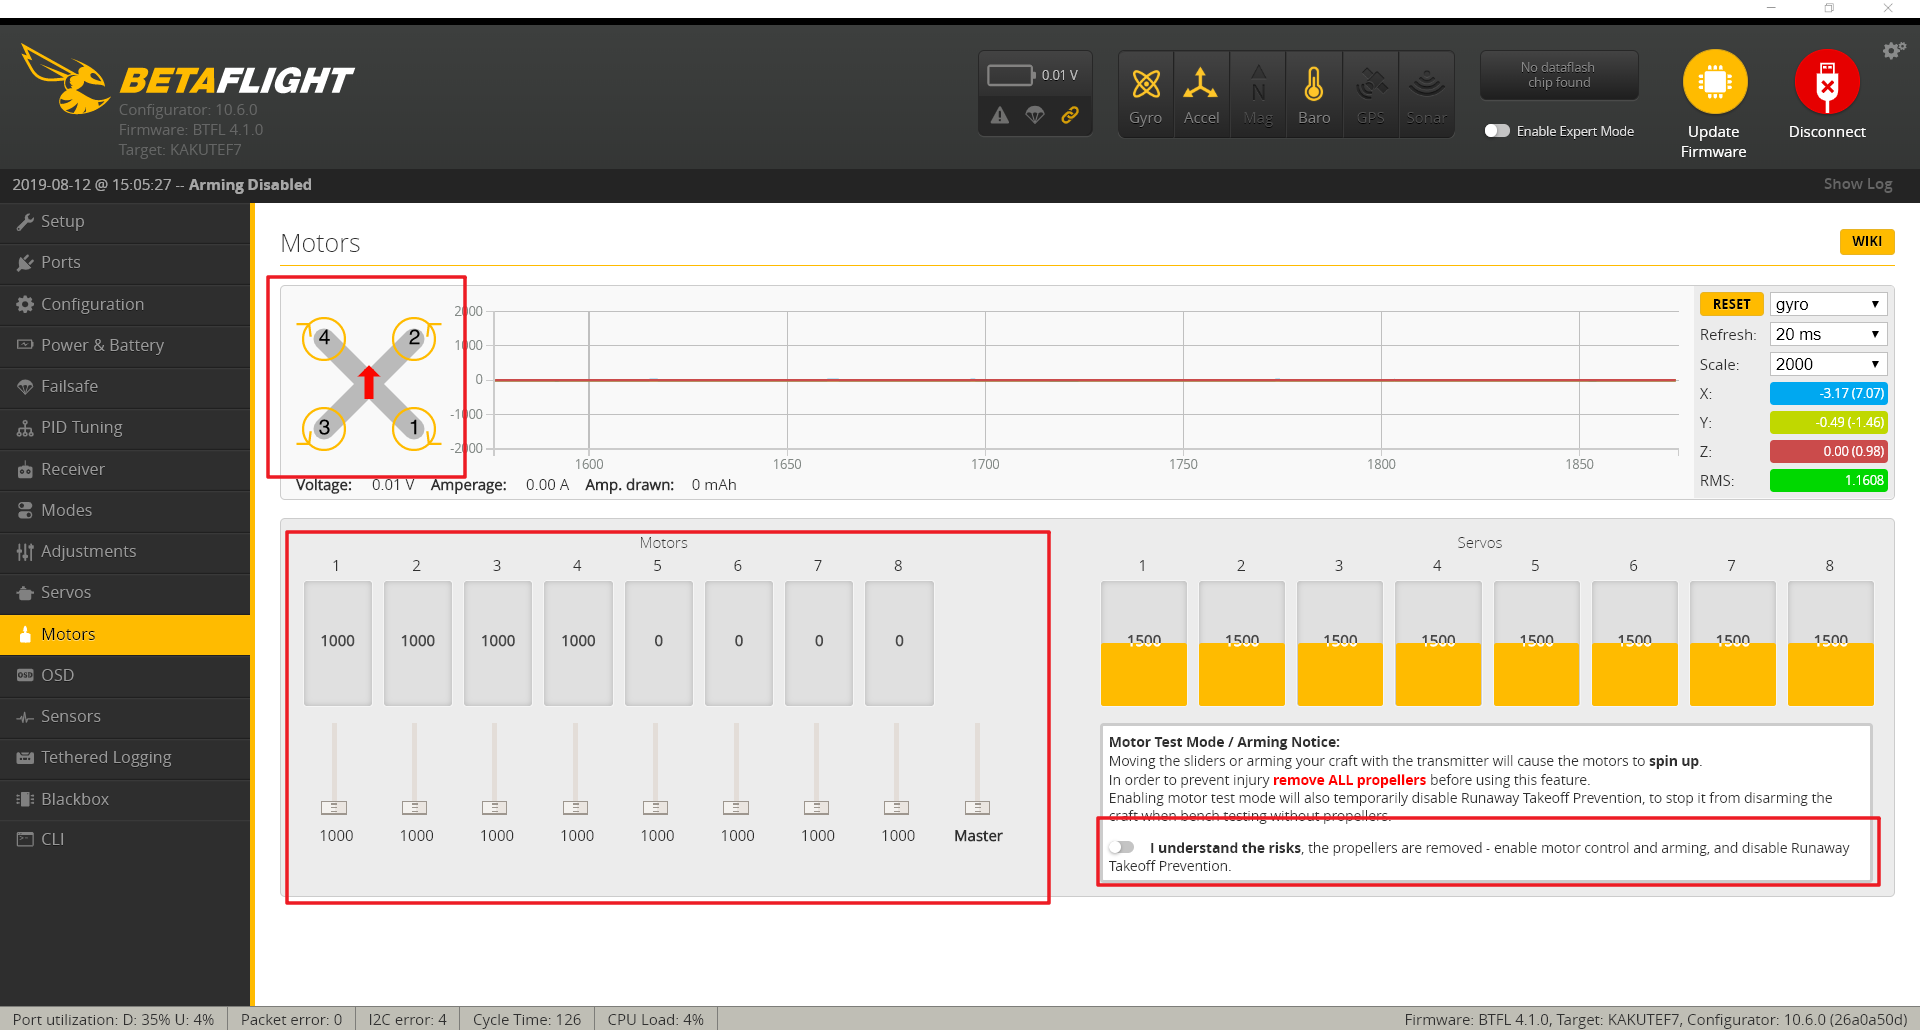
After the above setting is completed, enter the Motor page.
Before setting the motor, make sure that the drone propeller is removed.
First, read the terms and enable the switch on the right bottom of the page.
Slowly drag the left control bar until the motor starts rotation. Check whether the rotation of the motor with corresponding number is consistent with the information displayed on the left top picture.
After setting, remove the cable, and restart the drone. As the motor cannot be unlocked when the cable is connected or when the Betaflight is connected, you’d better restart it.
Toggle the SC switch to the bottom, and start the motor. Just enjoy the flight!